Earl Grey Tiramisu
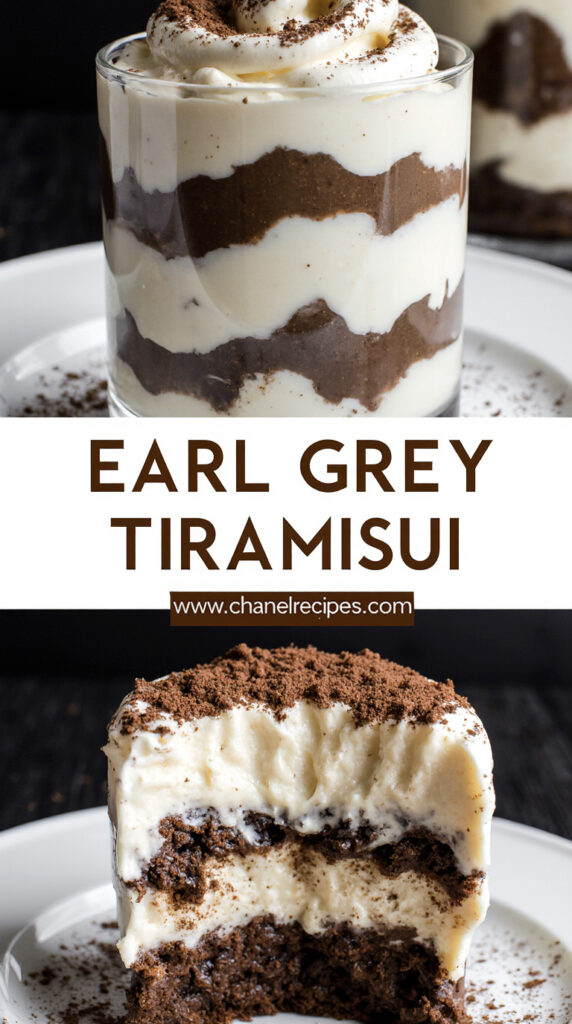
Earl Grey Tiramisu is a mix of creamy textures and a hint of citrus from Earl Grey tea. It’s a creative twist on the classic Italian tiramisu, adding the aromatic flavor of Earl Grey tea.
Tiramisu, meaning “pick-me-up” or “lift me up,” is a beloved Italian dessert. It’s known for its rich flavors and creamy texture. The traditional recipe uses ladyfingers soaked in coffee and liqueur, layered with a creamy mascarpone cheese mixture. Earl Grey Tiramisu adds a sophisticated touch by using Earl Grey tea, known for its bergamot oil-infused black tea.
The Earl Grey tea adds a citrusy note that goes well with the mascarpone’s richness. This makes a creamy tiramisu that’s both new and familiar. It’s what makes Earl Grey Tiramisu so magical.
Earl Grey Tiramisu combines the old with the new, making a refreshing twist on a favorite dessert. It’s great for those who want to try something different. The Earl Grey flavor adds a touch of elegance, making it perfect for special occasions or a unique treat for tea enthusiasts.
Essential Ingredients for Perfect Earl Grey Tiramisu
Making the perfect Earl Grey Tiramisu starts with the best ingredients. The quality of your tiramisu depends on what you choose. So, picking the right ingredients is key.
You’ll need high-quality Earl Grey tea first. This tea gives the tiramisu its unique taste. Choose a tea you love. You can use tea bags or loose-leaf tea, as long as it’s good quality. For a special touch, try adding a bit of vanilla to make a vanilla earl grey tiramisu.
Mascarpone cheese is also vital. This Italian cheese makes the tiramisu creamy. Pick fresh, high-quality mascarpone for the best taste. Don’t mix the mascarpone too much to keep it light.
You’ll also need ladyfingers, which should soak up the tea well but not get too wet. Dark chocolate or cocoa powder is great for dusting. And don’t forget eggs, sugar, and heavy cream for the creamy filling.
With these ingredients, you’re on your way to a tasty Earl Grey Tiramisu. It will be elegant and delightful with its mix of flavors and textures.
Equipment You’ll Need
To make this no-bake Earl Grey Tiramisu, you’ll need a few key pieces of equipment. Having the right tools on hand will make the preparation process smoother and more enjoyable.
The essential equipment includes:
- A large mixing bowl for whipping cream and mixing mascarpone
- A medium-sized bowl for preparing the Earl Grey infusion
- A measuring jug or cup for accurately measuring ingredients
- A hand mixer or stand mixer for efficiently whipping the cream to stiff peaks
- A spatula for gently folding the mascarpone mixture
- A rectangular dish or container (approximately 9×13 inches) for assembling the tiramisu
Because this is a no-bake tiramisu, you won’t need any baking equipment. This makes it a convenient dessert to prepare. Make sure your mixing bowls and utensils are clean and dry before starting.
Preparing the Earl Grey Infusion
Getting the Earl Grey infusion right is key to a great creamy tiramisu. This infusion adds the dessert’s unique taste and smell. You’ll need top-notch Earl Grey tea, which has bergamot oil. This oil is what makes the tea taste and smell like citrus.
To make the infusion, steep the Earl Grey tea in hot water. Use one teaspoon of loose-leaf tea for each cup of water. You can tweak this ratio to match your taste.
Balancing Bergamot Flavors
The bergamot in Earl Grey tea can be quite bold. It’s important to find the right balance. Adjust the steeping time to get the flavor just right. A longer steeping time means a stronger flavor, while a shorter time gives a milder taste. Try different times to find the perfect balance for your earl grey tiramisu.
| Steeping Time | Flavor Profile |
|---|---|
| 2-3 minutes | Mild, subtle citrus flavor |
| 4-5 minutes | Balanced, distinct Earl Grey flavor |
| 6 minutes or more | Strong, intense bergamot flavor |
Adjusting Sweetness Levels
You can change how sweet your earl grey tiramisu is by adjusting the sugar in the Earl Grey infusion. If you like it less sweet, start with a small amount of sugar. Taste as you go and add more if you want it sweeter.
By carefully making the Earl Grey infusion and balancing its flavors, you’ll make a rich and tasty creamy tiramisu. It’s sure to wow your guests.
Making the Creamy Mascarpone Filling
Now that you’ve made the Earl Grey infusion, it’s time to make the creamy mascarpone filling. This filling is key to making your tiramisu special. It adds a rich, creamy touch to the coffee-soaked ladyfingers.
To make this filling, you need mascarpone cheese, whipping cream, and a bit of sugar. The goal is to get a smooth, airy texture without mixing too much. First, whip the heavy cream until it’s stiff. Then, set it aside. Next, mix the mascarpone cheese with a bit of sugar until it’s well combined.
Achieving the Ideal Texture
The mascarpone filling should be smooth and creamy but firm enough to hold its shape. To get this, gently fold the whipped cream into the mascarpone mixture. Be careful not to overmix, as this can make the filling too stiff or separate.
| Ingredient | Quantity | Purpose |
|---|---|---|
| Mascarpone Cheese | 1 cup | Provides richness and creaminess |
| Whipping Cream | 1 cup | Adds lightness and texture |
| Sugar | 2 tbsp | Balances the flavor |
Preventing Common Mistakes
One common mistake is overmixing, which can make the filling dense or separate. To avoid this, mix the ingredients just until they come together, then stop. It’s also important to use fresh whipping cream and genuine mascarpone cheese for the best taste and texture in your light tiramisu.
By following these tips and paying attention to the texture, you can make a creamy mascarpone filling. This will be the highlight of your Earl Grey tiramisu.
Step-by-Step Guide to Earl Grey Tiramisu
Get ready to make your own Earl Grey Tiramisu. This dessert is a feast for your taste buds and a stunning sight to see.
To begin, dip your ladyfingers into the Earl Grey infusion you’ve made. They should be moist but not too wet, for the best texture.
Then, create a layer of ladyfingers in your dish. Trim them to fit perfectly. On top, spread half of your creamy mascarpone mixture. This adds a rich, creamy touch to your dessert.
Want to try something new? Add a bit of vanilla to your mascarpone for an extra layer of flavor. This makes it a unique vanilla Earl Grey Tiramisu.
Repeat the layers: ladyfingers, then the rest of the mascarpone cream. Smooth out the top for a clean finish.
To finish, dust your Earl Grey Tiramisu with cocoa powder or chocolate shavings. This adds elegance to your no-bake dessert.
By following these steps, you’ll create a stunning Earl Grey Tiramisu. It’s perfect for dinner parties or a special treat for yourself. Enjoy every bite!
Assembling Your No-Bake Tiramisu
Now that you have everything ready, it’s time to start making your no-bake tiramisu. This process is both fun and rewarding. The beauty of your tiramisu comes from its layers.
Creating Beautiful Visual Layers
To make your layers look great, start by dipping ladyfingers in Earl Grey infusion briefly. They should be soft but not too wet. This step is key for a creamy tiramisu texture and keeping the layers intact.
Start with a layer of ladyfingers at the bottom of your dish. Trim them to fit perfectly for a neat look.
| Layer | Ingredients | Tips |
|---|---|---|
| 1st Layer | Ladyfingers | Dip in Earl Grey infusion briefly |
| 2nd Layer | Creamy Mascarpone Filling | Spread evenly |
| 3rd Layer | Repeat ladyfingers | Optional: add a layer of cocoa powder |
Ensuring Structural Integrity
To keep your no bake tiramisu stable, balance the wet and dry parts. Don’t soak the ladyfingers too much, or it will be too soggy.
The mascarpone cream helps hold the layers together. Spread it evenly to keep the ladyfingers in place and for a smooth texture.
By following these steps and tips, you’ll make a stunning no-bake tiramisu. It will look amazing and taste even better, with a mix of textures and flavors in every bite.
Chilling and Setting Your Creamy Tiramisu
Chilling your creamy tiramisu is not just a waiting game; it’s where the magic happens. As you place your assembled dessert in the refrigerator, the flavors start to blend. The texture also becomes perfect.
The chilling process is key for your light tiramisu to get the right consistency. It lets the ladyfingers soak up the flavors well. The mascarpone mixture also sets right, making the dessert smooth and creamy.
Here’s a quick guide to the chilling process:
| Chilling Time | Result |
|---|---|
| Minimum 4 hours | Flavors start to meld, and the dessert begins to firm up. |
| 6-8 hours or overnight | Optimal flavor integration and texture setting. |
By chilling your creamy tiramisu for the right time, it will serve beautifully. It will also delight your guests with its rich flavors and smooth texture.
Serving Suggestions for Light Tiramisu
Now that your Earl Grey Tiramisu is chilled and set, it’s time to think about how to serve it. The presentation can make a big difference in enjoying this dessert. You can get creative with garnishes and accompaniments that match its light and creamy texture.
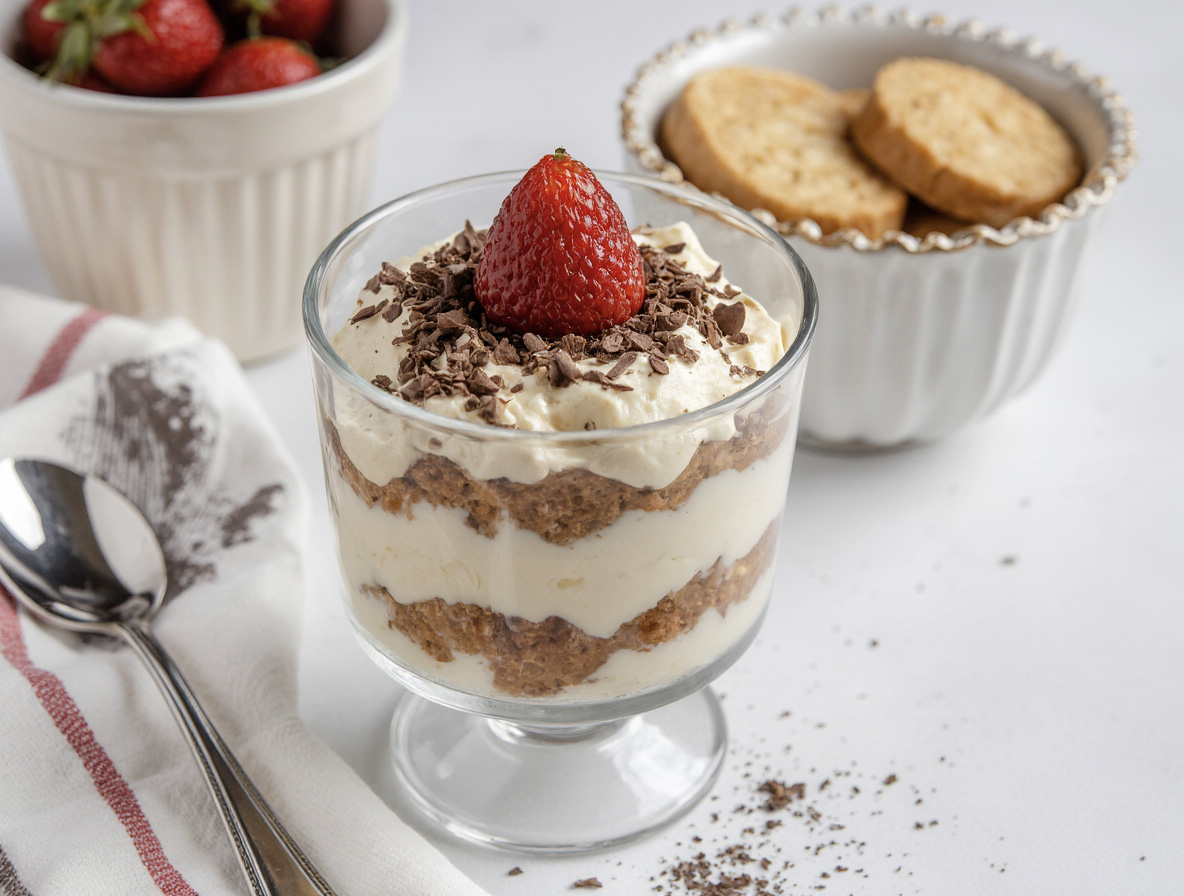
Consider dusting the top with a light layer of cocoa powder or powdered sugar for a classic look. For a more elegant presentation, arrange a few fresh berries, such as raspberries or strawberries, on top. The tartness of the berries pairs well with the sweetness of the mascarpone cream.
You can also serve your Earl Grey Tiramisu with a side of shortbread cookies or biscotti. The crunchy texture of these cookies contrasts nicely with the creamy tiramisu. For a more decadent treat, drizzle some chocolate sauce or caramel over the top.
Here’s a simple table to help you plan your serving suggestions:
| Garnish/Accompaniment | Description |
|---|---|
| Cocoa Powder | Dusts the top with a classic, chocolatey flavor |
| Fresh Berries | Adds a pop of color and a tangy contrast |
| Shortbread Cookies | Provides a crunchy texture and buttery flavor |
| Chocolate Sauce | Adds a rich, chocolatey flavor |
AsEleanor Rooseveltonce said, “The purpose of life is to live it, to taste experience to the utmost, to reach out eagerly and without fear for newer and richer experience.” This quote fits well with serving and enjoying your Earl Grey Tiramisu. It’s not just about the taste; it’s about creating memories around the dessert.
By considering these serving suggestions, you can make your Earl Grey Tiramisu even more special. It will be a memorable dessert for any occasion.
Variations on the Classic Earl Grey Tiramisu
Explore the world of Earl Grey Tiramisu by trying out new flavors and ingredients. The Vanilla Earl Grey Tiramisu is a great start. It adds vanilla extract to the ladyfingers, making the dessert creamy and sweet.
For a no-bake tiramisu, skip baking the ladyfingers. Use store-bought ones soaked in Earl Grey tea. This makes the dessert lighter and perfect for hot days.
Exploring Flavor Combinations
Try adding caramelized bananas or caramel sauce for a sweet and salty mix. Or, add lemon or orange zest to the mascarpone cream for a zesty twist.
- Add chopped nuts or chocolate shavings on top for texture.
- Try different teas or coffees for unique flavors.
- Use Kahlúa or Baileys to deepen the taste.
Layering your tiramisu with fresh fruit like raspberries or strawberries is another idea. It makes the dessert fruity and creamy. The trick is to mix flavors and textures well.
By trying these variations, you can make Earl Grey Tiramisu your own. You can choose a no-bake version or try new flavors. The options are endless.
Conclusion
You’ve now discovered the elegance of Earl Grey Tiramisu. It combines the sophistication of earl grey tea with the creaminess of mascarpone cheese. This no-bake treat is perfect for any occasion, from dinner parties to family gatherings.
By following the steps outlined in this article, you’ve learned how to create a delicious Earl Grey Tiramisu. The earl grey infusion adds a unique twist to the classic Italian dessert. It makes it a standout on any dessert table.
With its creamy texture and subtle tea flavor, Earl Grey Tiramisu is a dessert that’s sure to become a favorite. So go ahead, give it a try. Enjoy the delight on your guests’ faces when you serve this beautiful and delicious earl grey tiramisu.
FAQ
What is Earl Grey Tiramisu?
Earl Grey Tiramisu is a twist on the classic Italian dessert. It adds Earl Grey tea’s unique flavor to the mix. This makes it a sophisticated and tasty no-bake treat.
Can I use regular tea instead of Earl Grey tea?
You can try other teas, but Earl Grey’s bergamot is key. Regular tea will change the taste, but you can make a tasty tiramisu.
Is Earl Grey Tiramisu a no-bake dessert?
Yes, it’s a no-bake dessert. This makes it great for hot weather or when you don’t want to heat up your kitchen.
How do I achieve the right texture for the mascarpone filling?
Use top-quality mascarpone cheese and whip it gently. This will make it smooth and creamy. Don’t overmix to avoid a stiff or separated filling.
Can I make Earl Grey Tiramisu ahead of time?
Yes, it’s perfect for making ahead. It needs time to chill and set. Preparing it a day in advance lets the flavors blend well.
How do I store leftover Earl Grey Tiramisu?
Store it in an airtight container in the fridge. It stays good for several days. You can also freeze it for longer. Just thaw it in the fridge when you’re ready to serve.
Can I customize the Earl Grey Tiramisu recipe?
Absolutely! Try adding vanilla or using different teas or liqueurs. This way, you can make your own special Earl Grey Tiramisu.
Is Earl Grey Tiramisu a light and creamy dessert?
Yes, it’s light and creamy. The whipped mascarpone cheese and Earl Grey tea make it perfect. It’s not too rich or heavy.