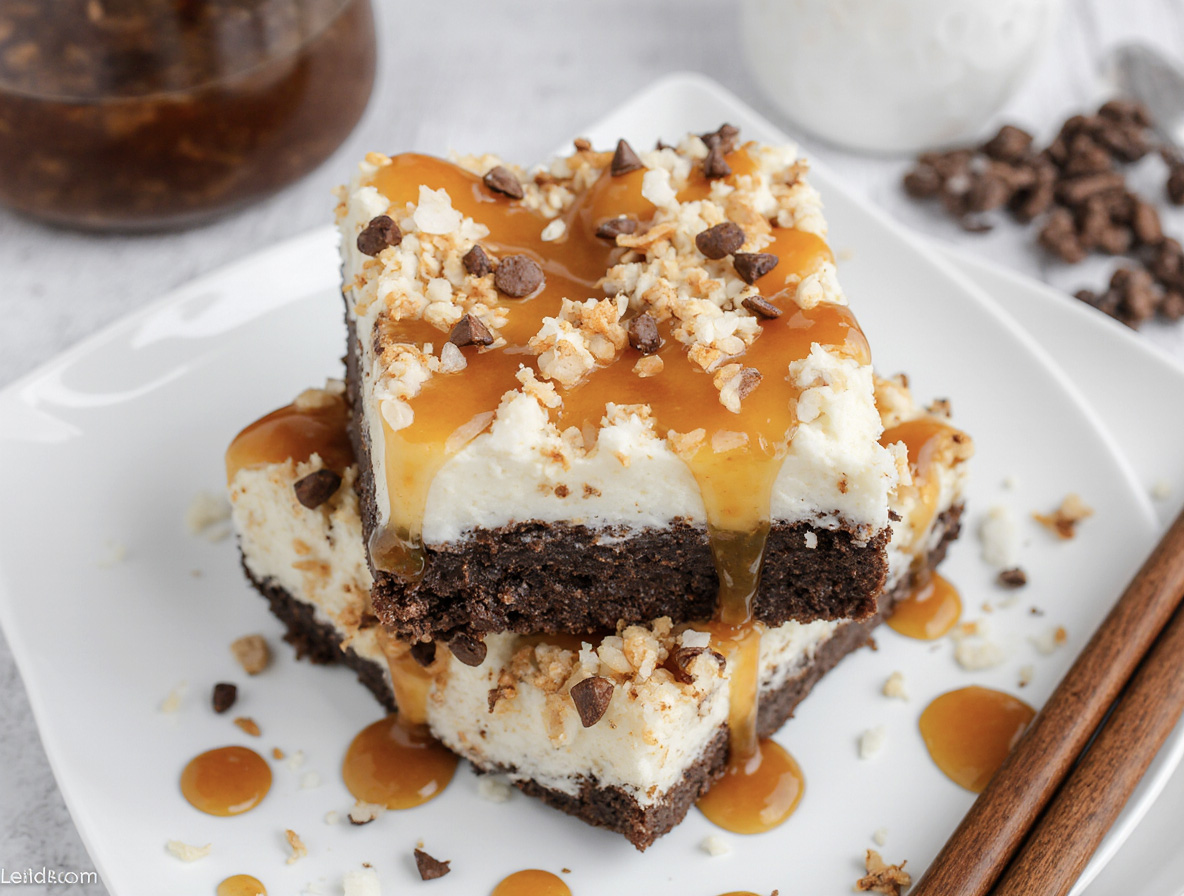
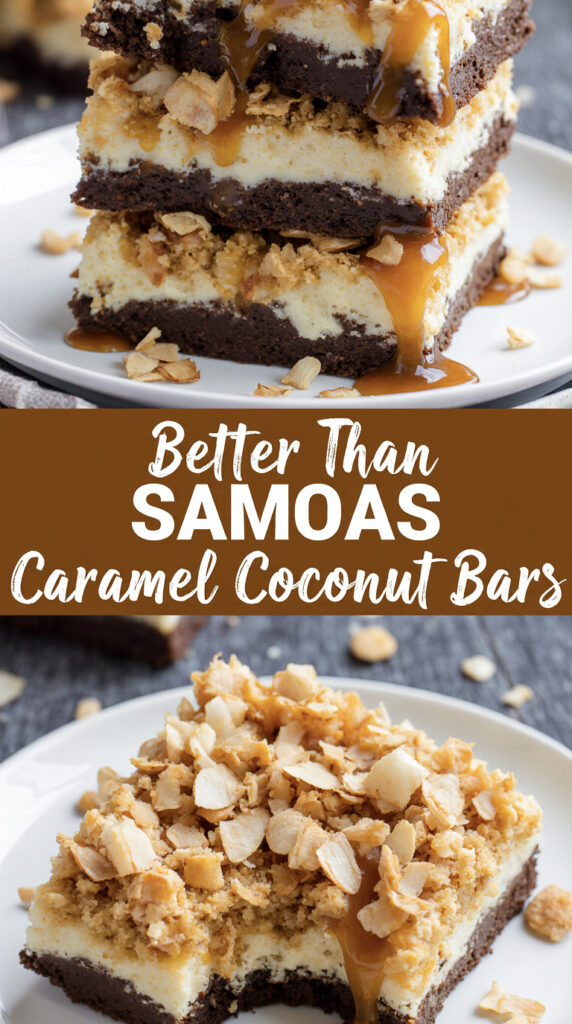
Better Than Samoas Caramel Coconut Bars
Who can resist the allure of Samoas? Those chewy, caramel-coated treats are a favorite among many. But what if you could create something even better in your own kitchen? Imagine sinking your teeth into a decadent, homemade dessert that combines caramel’s richness with coconut’s tropical flavor. All in a simple, easy-to-make bar.
You don’t have to be a skilled baker to make these delicious bars. With just a few ingredients and a straightforward recipe, you can enjoy a batch of these mouthwatering treats. The best part? They’re perfect for satisfying your sweet tooth or sharing with friends and family.
The Irresistible Appeal of Homemade Coconut Treats
Homemade coconut dessert bars have a special charm that beats store-bought ones. Making these delicious treats yourself adds a personal touch. It makes them even more special.
Why These Bars Rival the Famous Samoas
Homemade Caramel Coconut Bars have a flavor and texture that’s as good as, or even better than, Samoas cookies. It’s all about the quality of ingredients and the love put into making them. Using high-quality coconut and rich caramel sauce makes these bars an irresistible dessert for anyone who loves sweets.
The Perfect Balance of Flavors and Textures
The magic of these bars is in their layers. You get a crunchy cookie base, a gooey caramel coconut layer, and a smooth chocolate topping. This mix creates a sweet indulgence that’s hard to resist. Here’s what makes them so appealing:
| Component | Texture | Flavor |
|---|---|---|
| Cookie Base | Crunchy | Buttery |
| Caramel Coconut Layer | Gooey | Sweet, Tropical |
| Chocolate Topping | Smooth | Rich, Chocolatey |
Essential Ingredients for Perfect Caramel Coconut Bars
To make Caramel Coconut Bars like the famous Samoas, focus on quality ingredients. The right mix of flavors and textures comes from choosing the best for each layer.
Cookie Base Components
The cookie base is key. You’ll need:
- Flour: All-purpose flour is good, but whole wheat adds depth.
- Butter: Use high-quality, salted butter for better flavor.
- Sugar: Mix white and brown sugar for sweetness and caramel taste.
Flour, Butter, and Sugar Options
Think about each ingredient’s role. Cold butter makes the base crumbly. Brown sugar adds a richer taste. Try turbinado sugar for unique textures.
Caramel Coconut Layer Ingredients
The caramel coconut layer is where the magic is. It combines sweet caramel with toasted coconut. Key ingredients are:
- Coconut: Use shredded coconut, sweetened or unsweetened, as you like.
- Caramel: Homemade caramel sauce with heavy cream, butter, and sugar is best.
Selecting the Right Coconut
Choose high-quality shredded coconut for the best results. Unsweetened coconut makes the bars less sweet. Toasting the coconut before adding it to the caramel layer boosts flavor and texture.
Caramel Ingredient Quality Tips
High-quality ingredients make a big difference in caramel sauce. Use real butter and heavy cream. Margarine or low-fat alternatives can ruin the taste and texture.
Chocolate Drizzle Elements
The chocolate drizzle adds a luxurious touch. You’ll need high-quality chocolate for this.
Chocolate Types and Alternatives
Choose from milk, dark, or white chocolate for the drizzle. Dark chocolate contrasts well with caramel and coconut. Milk chocolate adds sweetness. Use chocolate chips or chopped chocolate bars for easy melting.
Kitchen Tools and Equipment You’ll Need
Before you start baking, let’s look at the tools you’ll need. Having the right tools makes baking more fun.
Baking Essentials
You’ll need basic baking tools for success. These include a 9×9-inch baking pan, parchment paper, a mixing bowl, a whisk, and a spatula. Also, a baking sheet is needed for toasting coconut.
| Tool | Purpose |
|---|---|
| 9×9-inch baking pan | For baking the cookie base |
| Parchment paper | For easy removal of the bars |
| Mixing bowl | For combining ingredients |
Optional but Helpful Tools
Some tools are not essential but can help a lot. A stand mixer makes mixing the dough easier. A candy thermometer helps get the caramel just right. For fun, try a chocolate drizzle tool or a coconut flaker.
“The right tools make all the difference in baking. With the right equipment, you can focus on creating delicious treats.”
— Baking Expert
With these tools, you’re ready to make this easy recipe. Enjoy making a tasty homemade dessert.
Preparing the Perfect Cookie Base
To get coconut caramel goodness, start with a great cookie base. This layer is key for the bar’s structure and taste.
Mixing the Shortbread Dough
Mixing the shortbread dough needs careful attention. Proper Butter Temperature Techniques are essential. The butter should be room temperature to mix well with sugar and other ingredients.
Baking Tips for an Ideal Foundation
Baking the cookie base right is vital. Achieving the Perfect Golden Color means it’s done well. Watch the edges, as they brown faster than the center.
Troubleshooting Common Base Issues
Even with the best effort, the cookie base might not always turn out right. Common problems include overbrowning or underbaking. See the table below for solutions.
| Issue | Cause | Solution |
|---|---|---|
| Overbrowning | Oven temperature too high | Reduce oven temperature or cover edges with foil |
| Underbaking | Insufficient baking time | Increase baking time in small increments until golden |
By following these tips, you’ll make a delicious treat that’s as good as store-bought caramel coconut bars.
Creating the Signature Caramel Coconut Bars Topping
The topping of your caramel coconut bars is key. It’s a mix of toasted coconut and rich caramel. This topping makes your dessert go from good to irresistible, a true sweet indulgence for all who try it.
Toasting Coconut to Perfection
Toasting coconut adds depth and warmth to your bars. You can toast it in the oven or on the stovetop.
Oven vs. Stovetop Methods
For the oven, spread coconut flakes on a baking sheet. Bake at 325°F (165°C), stirring often until golden. On the stovetop, use a dry skillet over medium heat. Stir constantly to avoid burning. Both methods need attention but are worth it.
Mastering the Caramel Sauce
Making perfect caramel sauce is an art. It takes patience and practice. You’ll need to choose between wet and dry caramel techniques, each with its own challenges and rewards.
Wet vs. Dry Caramel Techniques
The wet method adds water to sugar before heating, preventing crystals. The dry method melts sugar without water, giving a deeper flavor. Pick the method that fits your comfort and equipment.
Safety Tips for Caramel Making
Be careful when making caramel. Use a heavy-bottomed pan to avoid scorching. Never leave the stove alone. If new to caramel, have ice water ready in case of burns.
Combining Caramel and Coconut
With toasted coconut and caramel sauce ready, mix them gently. Fold the coconut into the caramel until smooth and even. This should coat the coconut well.
As you make your caramel coconut bars, you’ll see how they come together. The crunchy base, smooth topping, and chocolate drizzle (next section) will impress everyone.
By following these steps and practicing, you’ll make a caramel coconut recipe like a pro. Enjoy the journey, and don’t worry about early tries. Making perfect caramel coconut bars takes time to master.
Chocolate Finishing Touches
Now that your caramel coconut layer is ready, it’s time for the final touch: a rich chocolate coating. This step makes your Caramel Coconut Bars irresistible, just like the famous Samoas cookies.
Melting Chocolate Without Burning
Melting chocolate can be tricky, but with the right methods, you’ll get a smooth finish. You can melt chocolate using a double boiler or the microwave.
Double Boiler vs. Microwave Methods
The double boiler method heats water in a pot and places a bowl with chocolate over it. This method melts the chocolate gently. The microwave method heats chocolate in short intervals, stirring between each heating. Both methods work well, depending on what you prefer and what you have in your kitchen.
Drizzling Techniques for Professional Results
After melting your chocolate, it’s time to drizzle it over your Caramel Coconut Bars. Use a piping bag or a zip-top plastic bag with a corner cut off for a professional look. This lets you control the chocolate flow, creating a beautiful design. It might take a few tries to get it right, but don’t worry.
Adding Optional Garnishes
Consider adding garnishes to enhance your Caramel Coconut Bars. Chopped nuts, sea salt, or sprinkles add texture and look great. For a fancy touch, try edible gold dust or glitter. These small details can make your baking stand out and impress everyone.
By following these steps, you’ll make a delicious and beautiful treat. The mix of coconut caramel and chocolate is sure to be a hit.
Storing and Serving Your Caramel Coconut Bars
Storing your caramel coconut bars right is key to enjoying them at their best. Whether you’re saving them for later or eating them now, how you store and serve them matters. It affects their taste, texture, and look.
Proper Cooling and Cutting Techniques
First, cool your caramel coconut bars completely on a wire rack. This step prevents them from getting soggy. Once they’re cool, use a sharp knife to cut them into neat squares. For clean cuts, dip your knife in hot water and wipe it dry between cuts.
Storage Solutions for Maximum Freshness
You have several ways to store your caramel coconut bars. The choice depends on when you plan to eat them.
Room Temperature, Refrigerator, and Freezer Options
- Room Temperature: Store in an airtight container for up to 3 days. Keep them away from direct sunlight.
- Refrigerator: For longer storage, refrigerate for up to a week. Let the bars come to room temperature before serving for the best flavor.
- Freezer: Wrap individually in plastic wrap and store in a freezer-safe bag for up to 3 months. Thaw at room temperature or refrigerate overnight before serving.
| Storage Method | Duration | Notes |
|---|---|---|
| Room Temperature | Up to 3 days | Keep away from direct sunlight |
| Refrigerator | Up to a week | Let come to room temperature before serving |
| Freezer | Up to 3 months | Thaw at room temperature or refrigerate overnight |
Perfect Pairings and Serving Ideas
Caramel coconut bars are great on their own or with other treats. Try them with vanilla ice cream or a warm cup of coffee or tea. For an extra treat, drizzle with more caramel or chocolate sauce.
“The combination of textures and flavors in these caramel coconut bars makes them a perfect dessert for any occasion. Their ease of storage and serving flexibility only add to their appeal.”
By following these tips, your caramel coconut bars will stay a delightful homemade dessert everyone will love. Whether for a special event or just a sweet treat, these bars will impress.
Delicious Variations to Try
Take your baking to new heights with unique Caramel Coconut Bars variations. A few tweaks can turn this dessert into something truly special.
Flavor Additions and Substitutions
Caramel Coconut Bars are incredibly versatile. You can add or swap ingredients for new tastes. Try adding sea salt or chopped nuts for a salty-sweet mix. Or, swap the shortbread crust for a graham cracker or cookie one for a different feel.
- Add vanilla extract or liqueur (like Kahlúa or Baileys) to the caramel for a grown-up twist.
- Introduce dried cranberries or cherries for a fruity, tangy contrast to the caramel.
- Change the drizzle chocolate to white or dark for a different flavor.
Dietary Adaptations
Need to cater to specific diets? Caramel Coconut Bars can be adapted. For a gluten-free version, swap wheat flour for a gluten-free blend. For a vegan version, use coconut oil or vegan butter and dairy-free chocolate.
Other dietary tweaks include:
- Use almond or coconut flour for a low-carb or keto version.
- Replace sugar with honey or maple syrup for a natural sweetener.
- Choose a vegan caramel sauce or make your own with coconut cream and maple syrup.
Conclusion: Enjoying Your Homemade Treat
Now that you’ve made your own Caramel Coconut Bars, it’s time to enjoy them. These treats are great for satisfying your sweet tooth or sharing with loved ones. The mix of crunchy cookie, gooey caramel, toasted coconut, and chocolate is amazing.
Making homemade desserts like these can be fun and rewarding. You’ve followed steps to create a special treat that’s sure to be loved. Whether you’re eating them alone or sharing, these bars will impress everyone.
So, take a bite and enjoy the flavors of your homemade Caramel Coconut Bars. You’ve worked hard to make this delicious dessert!
FAQ
What is the best way to store Caramel Coconut Bars to maintain their freshness?
To keep your Caramel Coconut Bars fresh, store them in an airtight container. Keep them at room temperature for up to 5 days. Or, refrigerate them for up to 2 weeks or freeze for up to 3 months.
Can I make Caramel Coconut Bars without a double boiler for melting chocolate?
Yes, you can melt chocolate without a double boiler. Use the microwave in 30-second increments, stirring between each interval until smooth. Or, use a makeshift double boiler with a heatproof bowl over a pot of simmering water.
How do I achieve the perfect golden color for the cookie base?
To get the perfect golden color, bake the cookie base until it’s lightly golden around the edges. It should be set in the center. Keep an eye on it, as oven temperatures can vary.
Can I substitute the type of coconut used in the caramel coconut layer?
Yes, you can use different types of coconut, like shredded or flaked coconut. But, the texture may vary slightly depending on the coconut you choose.
Are Caramel Coconut Bars suitable for dietary restrictions like gluten-free or vegan diets?
Yes, you can make Caramel Coconut Bars gluten-free by using gluten-free flours. You can also make them vegan by substituting dairy products with vegan alternatives and using vegan chocolate. Just check the ingredient labels to ensure they meet your dietary needs.
What are some optional garnishes I can add to my Caramel Coconut Bars?
You can enhance your Caramel Coconut Bars with optional garnishes. Try adding chopped nuts, sea salt, or a sprinkle of shredded coconut on top of the chocolate drizzle. This adds texture and flavor.
How do I prevent the caramel from becoming too hard or too runny?
To get the perfect caramel consistency, monitor the temperature while making it. Avoid overheating or undercooking it. Let it cool slightly before pouring it over the toasted coconut.