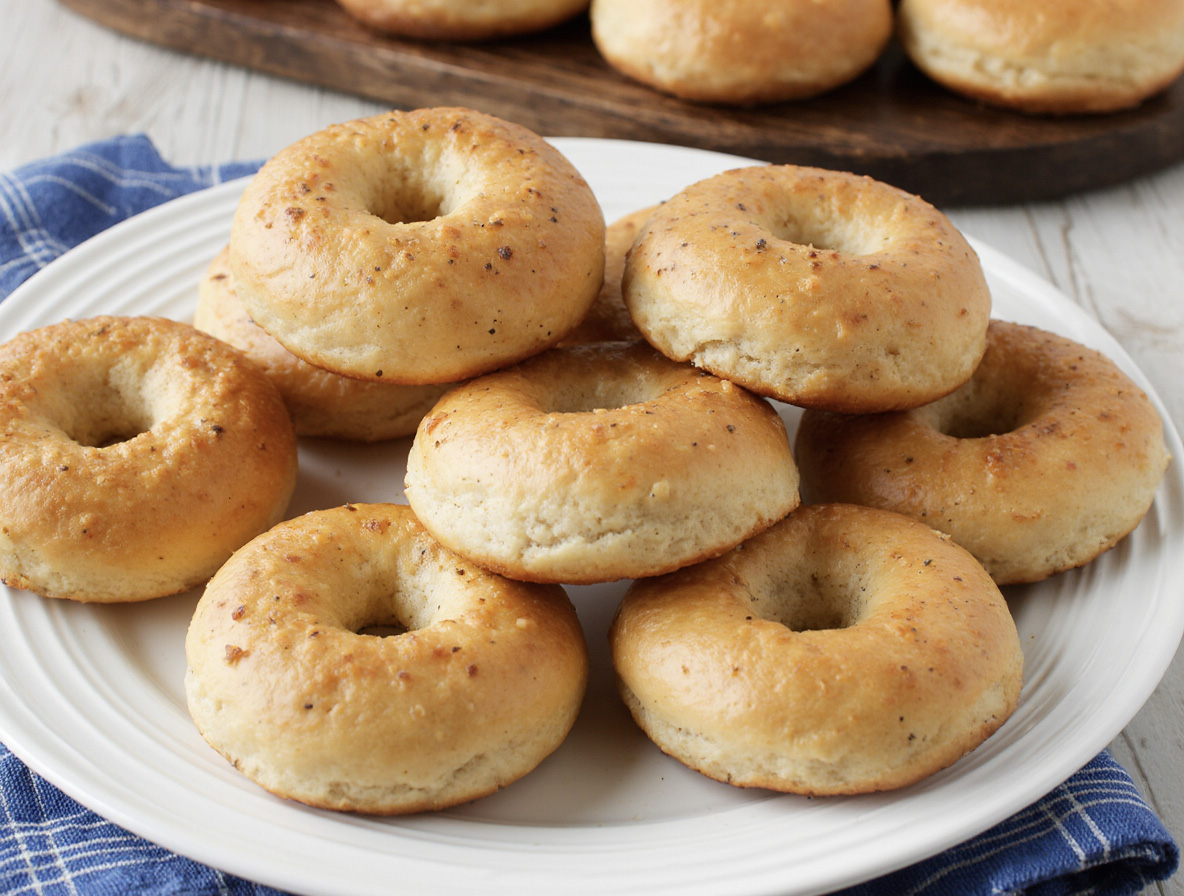
New York Style Mini Gluten Free Bagels
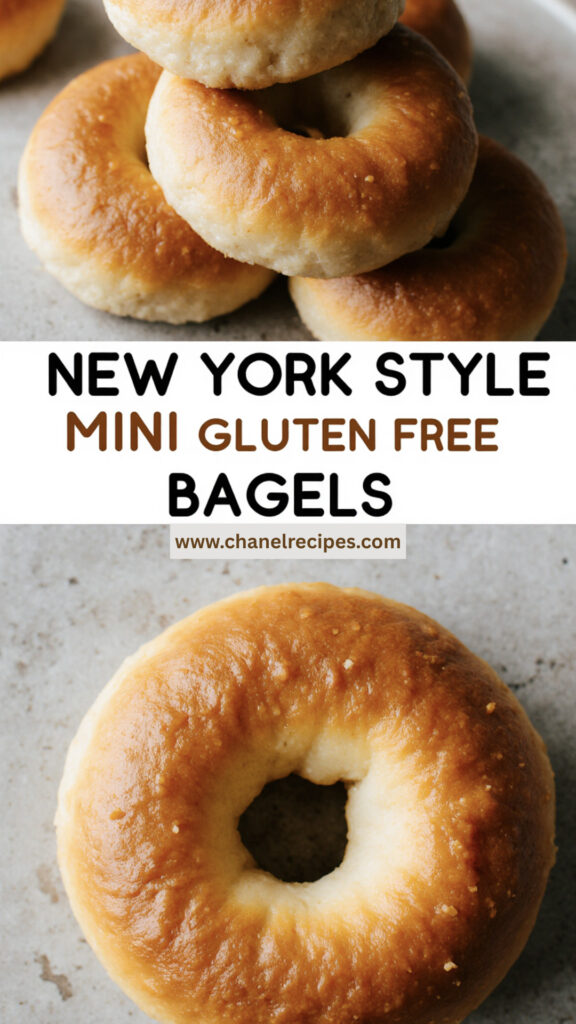
Imagine sinking your teeth into a perfectly chewy, crusty bagel, knowing it’s made just for you, and tailored to your dietary needs. Welcome to the world of gluten-free baking, where the classic taste of a New York-style bagel meets the convenience of a mini treat.
You can now enjoy the delight of freshly baked gluten-free bagels in the comfort of your own home. With simple, step-by-step instructions, you’ll be on your way to creating delicious, authentic-tasting bagels that are perfect for snacking or as a base for your favorite breakfast or lunch.
Why Make New York Style Mini Gluten Free Bagels at Home
Homemade New York Style Mini Gluten Free Bagels offer a delicious and safe alternative for those with gluten intolerance. By making these bagels at home, you’re not only ensuring they’re gluten-free, but you’re also getting to enjoy a fresher product, made with your choice of ingredients.
Control Over Ingredients
One of the main advantages of making your own gluten-free bagels is having complete control over the ingredients. You can choose to avoid preservatives and additives commonly found in commercial bagels. This is particularly beneficial for individuals with specific dietary needs or preferences.
Here are some benefits of having control over your ingredients:
- You can select the type and quality of flour used.
- You can control the amount of sugar and salt added.
- You can choose to include or avoid certain ingredients based on dietary needs.
The ability to customize your bagels to suit your taste preferences is another significant advantage. Whether you like a slightly sweet bagel or one with a bit of extra salt, you can adjust the recipe accordingly.
Making New York Style Mini Gluten Free Bagels at home also allows you to experiment with different flavors and ingredients, making the process fun and creative. You can try adding different herbs, spices, or seeds to create unique flavor profiles.
Essential Ingredients for New York Style Mini Gluten Free Bagels
The foundation of great New York Style Mini Gluten Free Bagels lies in their ingredients. To achieve that authentic New York bagel taste, you’ll need to select the right components. Let’s dive into the essential ingredients required for making these delicious treats.
Gluten-Free Flours: The primary ingredient in gluten-free bagels is a blend of gluten-free flours. You can use a pre-mixed gluten-free flour blend or create your own mix using various flours such as almond flour, coconut flour, rice flour, or potato starch. A good blend will provide the necessary structure and texture.
Yeast and Leavening Agents: Yeast is crucial for the rise, while salt enhances the flavor. You may also need to add xanthan gum or guar gum to improve the texture and help bind the ingredients together.
Here’s a breakdown of the key ingredients and their roles:
| Ingredient | Role |
|---|---|
| Gluten-Free Flour Blend | Provides structure and texture |
| Yeast | Facilitates rise |
| Salt | Enhances flavor |
| Xanthan Gum or Guar Gum | Improves texture and binding |
| Sugar | Feeds yeast for rise |
When selecting your ingredients, consider the quality and type. For instance, active dry yeast is a good choice for bagels, and using a high-quality salt can enhance the flavor. The type of sugar used can also impact the yeast’s activity.
By choosing the right ingredients and understanding their roles, you’ll be well on your way to making delicious New York Style Mini Gluten Free Bagels at home.
Equipment You’ll Need
The right equipment can simplify the process of making New York Style Mini Gluten Free Bagels. To get started, you’ll need a few essential tools.
Key Equipment for Making Gluten-Free Bagels:
- A large mixing bowl for combining ingredients
- Measuring cups and spoons for accurate measurements
- A dough scraper for handling the dough
- A baking sheet lined with parchment paper for baking
- A pot for boiling water, equipped with a slotted spoon for gently placing bagels into the water
Having the right equipment not only makes the process smoother but also ensures that your bagels turn out perfectly. Here’s a summary of the equipment and their uses in a tabular format:
| Equipment | Use |
|---|---|
| Mixing Bowl | Combining ingredients |
| Measuring Cups/Spoons | Accurate measurements |
| Dough Scraper | Handling dough |
| Baking Sheet | Baking bagels |
| Pot with Slotted Spoon | Boiling and retrieving bagels |
By having these tools at your disposal, you’ll be well on your way to making delicious New York Style Mini Gluten Free Bagels at home.
Preparing Your Gluten-Free Bagel Dough
The foundation of a great gluten-free bagel lies in its dough, which requires careful preparation. To start, you’ll need to combine your dry ingredients, including gluten-free flours, yeast, and salt, in a large mixing bowl.
Mixing the Dough: Use a stand mixer or a wooden spoon to mix the dry ingredients together. Gradually add your wet ingredients, such as eggs and water, to form a sticky dough. It’s essential to mix the ingredients thoroughly to ensure they are well incorporated.
Kneading the Dough: Kneading is a critical step in developing the dough’s texture. For gluten-free dough, it’s often more about manipulating the dough gently to avoid developing too much structure, which can make the bagels dense. You can knead the dough by hand or use a dough hook attachment on your stand mixer.
Tips for Achieving the Right Consistency
Achieving the right consistency is crucial for gluten-free bagel dough. The dough should be sticky but not too wet. If it’s too dry, your bagels might turn out dense. Here are some tips:
- Adjust the liquid content gradually to achieve the right stickiness.
- Use a dough that’s slightly sticky to the touch but holds its shape.
- Avoid overworking the dough to prevent it from becoming tough.
By following these guidelines, you’ll be able to prepare a gluten-free bagel dough that’s perfect for shaping into your New York Style Mini Gluten Free Bagels. Remember, practice makes perfect, so don’t be discouraged if your first batch doesn’t turn out as expected.
Shaping and Proofing Your Mini Bagels
To achieve the authentic New York-style mini gluten-free bagels, you need to master the technique of shaping the dough. Shaping gluten-free bagels requires a gentle touch to preserve the delicate structure of the dough.
The first step in shaping is to divide your gluten-free dough into equal portions. You can do this by weighing the dough and dividing it into 8-10 equal pieces, depending on how large you want your mini bagels to be. Once you have your portions, roll each piece into a ball and then use your thumbs to create a hole in the center, stretching the dough outwards to form a bagel shape.
Tips for Shaping:
- Gently handle the dough to avoid developing too much tension, which can lead to dense bagels.
- Make the hole in the center large enough so that the bagel doesn’t shrink into a ring during proofing and baking.
- Place the shaped bagels onto a baking sheet lined with parchment paper, leaving enough space between each bagel for expansion.
The Importance of Proofing
Proofing gluten-free dough is a critical step that allows the yeast to ferment the sugars, giving your bagels their characteristic flavor and texture. During proofing, the dough relaxes, and the yeast starts to produce carbon dioxide, causing the dough to rise.
To proof your mini bagels, cover them with a damp cloth and let them sit in a warm, draft-free place. The ideal proofing time can vary depending on the temperature and the activity of your yeast, but generally, it takes about 1 hour, or until they have puffed up slightly.
| Proofing Conditions | Ideal Time | Result |
|---|---|---|
| Warm, draft-free place | 1 hour | Slightly puffed, relaxed dough |
| Cold environment | 2-3 hours | More pronounced rise, better flavor |
After proofing, your mini bagels will be ready for the next step in the process. Proper shaping and proofing are crucial for achieving the right texture and flavor in your gluten-free bagels.
The Boiling Process: Key to New York Style Mini Gluten Free Bagels
To achieve the characteristic crust of a New York bagel, boiling your mini gluten-free bagels is essential. This step is what sets New York-style bagels apart from other types of bagels. The boiling process creates a crust on the outside while keeping the inside soft and chewy.
Boiling gluten-free bagels requires some care to ensure they don’t fall apart. Using the right ingredients in the boiling water can make a significant difference. Typically, you’ll want to add sugar or malt syrup to the water, as these help to create the bagel’s crust.
Tips for Boiling Gluten-Free Bagels
Here are some tips to help you boil your gluten-free bagels successfully:
- Use the right pot: Choose a large pot that can hold enough water to cover the bagels completely.
- Add sugar or malt syrup: Adding a tablespoon or two of sugar or malt syrup to the boiling water enhances the crust.
- Bring to a boil: Ensure the water is at a rolling boil before adding the bagels.
- Cook for the right time: Boil the bagels for 1-2 minutes on each side. This helps in creating a uniform crust.
- Handle gently: Use a slotted spoon to gently place the bagels in the boiling water and to remove them once done.
| Boiling Time | Effect on Bagel |
|---|---|
| 1 minute per side | Light crust, soft interior |
| 2 minutes per side | Thicker crust, chewier interior |
By following these tips and understanding the importance of the boiling process, you can achieve that perfect New York-style crust on your mini gluten-free bagels. The boiling process, combined with the right ingredients and baking, will give your bagels an authentic taste and texture.
Baking and Storing Your Mini Bagels
With your mini bagels boiled, the next step is baking, which will give them their signature chew and crust. To bake your gluten-free mini bagels, preheat your oven to 425°F (220°C). Line a baking sheet with parchment paper or a silicone mat to prevent the bagels from sticking.
Place the boiled bagels on the prepared baking sheet, leaving about 1 inch of space between each bagel. You can brush the tops with egg wash or melted butter for a golden glaze. This step is optional but adds to the bagel’s appearance and flavor.
Baking Time: Bake the bagels for 15-20 minutes, or until they are golden brown. The exact baking time may vary depending on your oven and the size of your bagels. It’s crucial to check on them after 15 minutes to avoid overcooking.
Storing Your Gluten-Free Bagels
Once your mini bagels are baked and cooled, it’s essential to store them properly to maintain their freshness. You can store them in an airtight container at room temperature for up to 3 days. For longer storage, consider freezing the bagels.
To freeze, place the cooled bagels in a single layer on a baking sheet and put it in the freezer. Once frozen, transfer them to a freezer-safe bag or container. You can store frozen bagels for up to 2 months. Simply thaw at room temperature or toast them when you’re ready to enjoy.
Tip:If you find your bagels becoming stale, try refreshing them in the oven at 350°F (175°C) for a few minutes. This can revive their texture and flavor.
By following these steps for baking and storing, you can enjoy your homemade gluten-free mini bagels for days to come.
Conclusion: Enjoying Your Homemade Gluten-Free Bagels
You’ve successfully made delicious New York Style Mini Gluten Free Bagels at home. Now, it’s time to enjoy the fruits of your labor. Savor your freshly baked gluten-free bagels, topped with your favorite spreads or used to make a satisfying sandwich.
Share your homemade bagels with family and friends, and explore various toppings to enhance your bagel experience. Enjoying homemade gluten free bagels is a delightful experience, and with your newfound skills, you can relish New York Style Mini Gluten Free Bagels whenever you want.
Experiment with different flavors and ingredients to create unique bagel variations. Your ability to craft these tasty treats at home opens up a world of possibilities for enjoying your favorite bagels without gluten.
FAQ
What is the best gluten-free flour blend for making New York Style Mini Gluten Free Bagels?
The best gluten-free flour blend for making New York Style Mini Gluten Free Bagels typically includes a combination of rice flour, potato starch, and tapioca flour. You can also experiment with other gluten-free flours like almond flour or coconut flour, but be aware that they may affect the texture and taste.
Can I make New York Style Mini Gluten Free Bagels without xanthan gum or guar gum?
While xanthan gum or guar gum can help with texture and structure, you can still make gluten-free bagels without them. However, you may need to adjust the ratio of your gluten-free flours or add other ingredients to achieve the right consistency.
How do I achieve the characteristic chew of a New York bagel in my gluten-free version?
To achieve the characteristic chew of a New York bagel, make sure to boil your gluten-free bagels before baking. This step helps create the crust and texture that New York bagels are known for. You can also try adjusting your gluten-free flour blend or adding ingredients like sugar or malt syrup to enhance the chew.
Can I store my New York Style Mini Gluten Free Bagels for later use?
Yes, you can store your gluten-free bagels in an airtight container at room temperature for up to 3 days or freeze them for up to 2 months. Simply thaw or refresh your bagels by toasting or baking them when you’re ready to enjoy.
How do I know if my gluten-free bagel dough is ready to shape?
Your gluten-free bagel dough is ready to shape when it has reached the right consistency and has been proofed long enough to develop a slightly puffy texture. You can test the dough by gently pressing it; if it springs back slowly, it’s ready to shape.
Can I customize my New York Style Mini Gluten Free Bagels with different toppings or spreads?
Absolutely! You can customize your gluten-free bagels with a variety of toppings or spreads, such as cream cheese, avocado, or sesame seeds. Feel free to experiment with different combinations to find your favorite.
Are New York Style Mini Gluten Free Bagels suitable for other dietary restrictions?
While these bagels are gluten-free, you should still check the ingredient labels to ensure they meet other dietary requirements, such as being dairy-free or vegan-friendly. You can also experiment with alternative ingredients to accommodate other dietary needs.