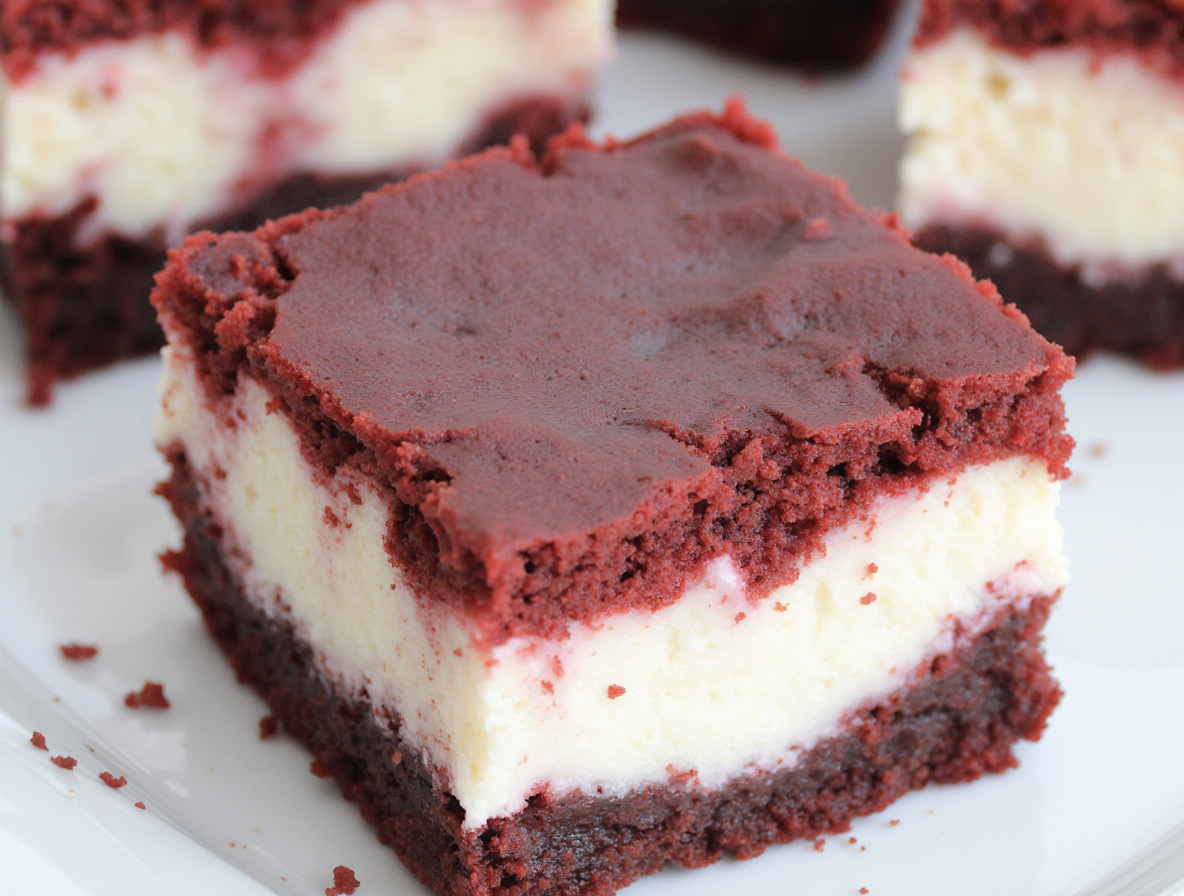
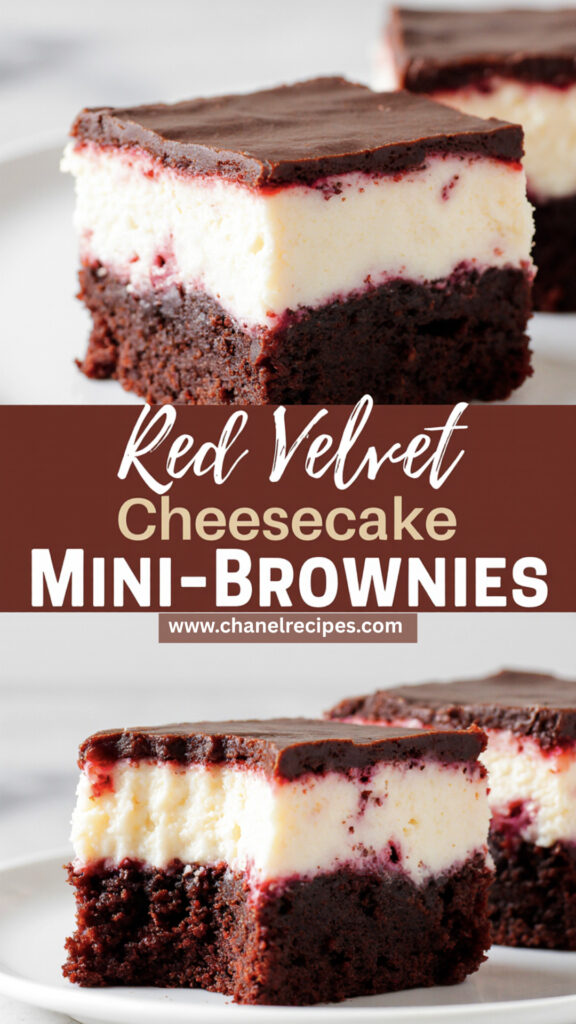
Red Velvet Bottom Cheesecake Mini Brownies
Imagine sinking your teeth into a decadent red velvet treat, with a creamy cheesecake layer on top. The combination sounds divine, doesn’t it? These mini brownies are perfect for any occasion, whether you’re hosting a party or simply satisfying your sweet tooth.
You’ll love how the velvety texture of the brownies pairs with the creamy cheesecake, creating a delightful contrast of flavors. With our step-by-step guide, you’ll be able to create these delicious treats in no time.
Essential Ingredients for Perfect Mini Brownies
The key to delicious mini brownies lies in the quality of the ingredients you use. When making Red Velvet Bottom Cheesecake Mini Brownies, you’ll need to focus on the ingredients that give the red velvet layer its distinctive flavor and color.
For the red velvet layer, you’ll need high-quality cocoa powder to give your brownies a deep, rich flavor. Dutch-processed cocoa powder is recommended for its smooth and mellow taste. Additionally, sugar plays a crucial role in balancing the bitterness of the cocoa. You’ll need both granulated sugar and brown sugar to achieve the perfect balance of sweetness.
Achieving that distinctive red velvet color requires a combination of the right cocoa powder and red food coloring. The amount of coloring needed may vary depending on the intensity of color you desire.
Tips for Choosing the Right Type of Flour
The type of flour you use can significantly affect the texture of your mini brownies. For a tender crumb, it’s recommended to use all-purpose flour or cake flour. All-purpose flour provides a good balance between structure and tenderness, while cake flour gives a finer texture.
Here’s a summary of the essential ingredients and their roles:
| Ingredient | Purpose |
|---|---|
| Cocoa Powder | Gives deep, rich flavor |
| Granulated Sugar | Balances bitterness, adds sweetness |
| Brown Sugar | Adds depth to sweetness, moistness |
| Red Food Coloring | Achieves distinctive red velvet color |
| All-purpose or Cake Flour | Provides tender crumb, texture |
By focusing on these essential ingredients and choosing the right type of flour, you’ll be well on your way to creating perfect Red Velvet Bottom Cheesecake Mini Brownies.
Kitchen Tools and Equipment You’ll Need
Before you start mixing, ensure you have the necessary kitchen tools for baking these delicious treats. The most critical piece of equipment is a mini brownie pan, which allows you to achieve the perfect size and texture for your Red Velvet Bottom Cheesecake Mini Brownies.
In addition to a mini brownie pan, you’ll need a few other essential tools. A mixing bowl is necessary for combining your ingredients, while a whisk will help you mix everything thoroughly. A rubber spatula is also handy for scraping the sides of the bowl and folding ingredients together.
Other useful equipment includes a measuring cups and spoons set for accurate measurements and a baking sheet to place your mini brownie pan on while it bakes. Having these tools on hand will make the baking process smoother and more enjoyable.
Preparing Your Kitchen and Ingredients
To ensure a smooth baking experience, preparing your kitchen and ingredients is a step you can’t skip. Start by clearing your countertops and gathering all the necessary tools and equipment. This will help you stay organized and focused throughout the baking process.
Clear your workspace and remove any clutter or distractions. Make sure your oven is preheated to the correct temperature, and you have all the required baking pans and utensils within reach.
How to Measure Ingredients Accurately
Measuring ingredients accurately is crucial for achieving the perfect balance of flavors in your Red Velvet Bottom Cheesecake Mini Brownies. To do this, use a digital kitchen scale to weigh dry ingredients like flour, sugar, and cocoa powder.
| Ingredient | Measuring Method | Tips |
|---|---|---|
| Dry Ingredients (flour, sugar, etc.) | Digital kitchen scale | Ensure the scale is set to zero before measuring. |
| Liquid Ingredients (milk, oil, etc.) | Liquid measuring cups | Place the cup on a flat surface and read at eye level. |
| Small Quantities (spices, etc.) | Teaspoons/Tablespoons | Use standardized measuring spoons for accuracy. |
By following these tips and preparing your kitchen and ingredients properly, you’ll be well on your way to creating delicious Red Velvet Bottom Cheesecake Mini Brownies.
Step-by-Step: Creating the Perfect Red Velvet Layer
The red velvet layer is the foundation of your Red Velvet Bottom Cheesecake Mini Brownies, and getting it right is crucial. To start, you’ll need to mix the batter to the right consistency, ensuring it’s neither too thick nor too thin.
Mixing the Batter: Begin by combining the dry ingredients, including flour, cocoa powder, and baking powder, in one bowl. In another, whisk together the wet ingredients: sugar, eggs, and buttermilk. The key to a smooth batter is gradual incorporation of the dry ingredients into the wet ingredients, stirring gently to avoid overmixing.
Achieving the Right Color: The distinctive red velvet color comes from a reaction between the cocoa powder and the acidic buttermilk. To enhance this color, add a few drops of red food coloring. Start with a small amount and adjust until you achieve the desired hue.
Tips for Achieving the Right Consistency
- Use room temperature ingredients to ensure a smooth mix.
- Avoid overmixing, as it can lead to a dense layer.
- If the batter seems too thick, add a small amount of buttermilk. If it’s too thin, add a bit more flour.
By following these steps and tips, you’ll be able to create a red velvet layer that’s not only delicious but also visually appealing. The perfect red velvet layer is all about balance—balance in flavor, texture, and color.
How to Master the Cheesecake Middle
Achieving a creamy cheesecake middle is a delicate process, but with the right techniques, it’s within your reach. The cheesecake layer is a crucial component of your Red Velvet Bottom Cheesecake Mini Brownies, providing a rich contrast to the dense brownie and the subtle red velvet base.
To start, you’ll need to prepare your cheesecake batter carefully. Begin by beating the cream cheese until it’s smooth and creamy. This step is essential for avoiding lumps in your cheesecake. Next, you’ll add granulated sugar, eggs, and vanilla extract, mixing each ingredient thoroughly before adding the next.
Tips for a Creamy Cheesecake
- Use room temperature ingredients: This ensures that your cheesecake batter mixes smoothly and evenly.
- Avoid overmixing: Overmixing can introduce air into the batter, leading to cracks in your cheesecake.
- Don’t overbake: A cheesecake that’s overbaked will be dry and crumbly. It’s done when the edges are set, and the center is just slightly jiggly.
By following these tips and being mindful of your mixing and baking techniques, you can achieve a cheesecake middle that’s not only creamy but also rich and indulgent. Remember, the key to a perfect cheesecake middle lies in the quality of your ingredients and the care you take during the preparation process.
Crafting the Brownie Top Layer
Crafting the perfect brownie top layer is essential for the ultimate Red Velvet Bottom Cheesecake Mini Brownies experience. This layer adds a rich, fudgy texture that complements the red velvet and cheesecake layers. To achieve this, you’ll need to mix the brownie batter carefully and bake it to perfection.
To start, preheat your oven to the specified temperature and prepare your baking pans. The brownie batter should be mixed until it’s just combined; overmixing can lead to a dense, rather than fudgy, texture. Use high-quality cocoa powder for the best flavor, and don’t hesitate to add in any additional ingredients like nuts if you prefer.
Tips for a Fudgy Brownie Top
Achieving a fudgy brownie top requires attention to detail. Don’t overbake; a slightly underbaked brownie will retain its moisture. Use the toothpick test to check for doneness: a few moist crumbs attached to the toothpick indicate that the brownie is ready.
- Use a combination of white and brown sugar for a deeper flavor.
- Avoid overmixing the batter to prevent a tough texture.
- Bake until the edges are set but the center is still slightly underdone.
By following these tips and paying close attention to your baking time, you’ll be able to create a fudgy brownie top layer that elevates your Red Velvet Bottom Cheesecake Mini Brownies to the next level. The combination of textures and flavors will make these treats irresistible.
Assembling Your Red Velvet Bottom Cheesecake Mini Brownies
The assembly of your Red Velvet Bottom Cheesecake Mini Brownies is where the magic happens, turning individual components into a cohesive dessert. To start, you’ll need to prepare your workspace by having all your components ready: the red velvet base, the cheesecake middle, and the brownie top.
Begin by placing a small amount of the red velvet mixture into the mini brownie pan, ensuring it’s evenly distributed. You can use a small cookie scoop or spoon to portion out the mixture. Gently press the mixture into the bottom of the pan to form a solid base.
Next, it’s time for the layering process. Carefully place a layer of cheesecake mixture on top of the red velvet base. Make sure to leave a small border around the edges to prevent the cheesecake from oozing out during baking. The key to successful assembling mini brownies is to ensure each layer is evenly distributed.
Finally, top the cheesecake layer with a brownie mixture, spreading it evenly to cover the entire surface. Use a spatula or the back of a spoon to smooth out the top, creating a uniform layer.
By following these steps, you’ll achieve a beautifully layered Red Velvet Bottom Cheesecake Mini Brownie that’s sure to impress. The layering process not only adds visual appeal but also ensures a delightful mix of flavors in every bite.
Baking Tips and Timing for Mini Brownies
Mini brownies are a delightful treat, but baking them to perfection involves more than just following a recipe; it demands attention to baking time and technique. To achieve the perfect bake, you need to consider several factors, including your oven’s temperature accuracy and the size of your mini brownie pans.
Understanding Your Oven is crucial. Every oven is different, and what works for one may not work for another. It’s a good idea to invest in an oven thermometer to ensure your oven is at the correct temperature. This simple step can make a significant difference in the outcome of your baked goods.
When it comes to baking mini brownies, timing is everything. The general guideline is to bake them for 12-15 minutes, but this can vary based on your oven and the size of the brownies. It’s essential to keep an eye on them as they bake.
Tips for Checking Doneness
- Use the toothpick test: Insert a toothpick into the center of a brownie. If it comes out with a few moist crumbs, they’re done. If it’s clean, they might be overcooked.
- Check the edges: The edges should be set and slightly pulled away from the pan.
- Look for the shine: A perfectly baked brownie will have a slight sheen on top but should not be wet or glossy.
By following these baking tips and paying close attention to timing, you’ll be able to achieve perfectly baked mini brownies every time. Remember, practice makes perfect, so don’t be discouraged if it takes a few tries to get it just right.
Storage and Make-Ahead Options
Once you’ve baked your Red Velvet Bottom Cheesecake Mini Brownies, it’s essential to store them properly to maintain their freshness. You can store them in an airtight container at room temperature for up to 3 days. If you need to store them for a longer period, consider refrigerating or freezing them.
Tips for Freezing and Thawing
Freezing is an excellent way to keep your mini brownies fresh for a longer time. To freeze, place the brownies in a single layer on a baking sheet and put it in the freezer until they are frozen solid. Then, transfer them to an airtight container or freezer bag for storage. When you’re ready to serve, simply thaw the brownies at room temperature or refrigerate them overnight to thaw.
| Storage Method | Duration | Thawing Instructions |
|---|---|---|
| Room Temperature | Up to 3 days | N/A |
| Refrigerate | Up to 5 days | N/A |
| Freeze | Up to 2 months | Thaw at room temperature or refrigerate overnight |
By following these storage and make-ahead options, you can enjoy your Red Velvet Bottom Cheesecake Mini Brownies at their best, whether you’re serving them immediately or saving them for later.
Conclusion
You’ve now mastered the art of creating red velvet bottom cheesecake mini brownies, a dessert that’s sure to impress. With the steps outlined in this guide, you’re ready to indulge in the rich flavors and textures of these bite-sized treats.
Feel free to experiment with new variations and flavors, adding your own twist to this classic dessert. Try different types of nuts or flavorings to create unique red velvet bottom cheesecake mini brownies that will delight your friends and family.
As you continue to bake and experiment, you’ll find that the possibilities are endless. So go ahead, get creative, and enjoy the process of crafting delicious red velvet bottom cheesecake mini brownies that are sure to become a favorite.
FAQ
What is the best way to store Red Velvet Bottom Cheesecake Mini Brownies?
You can store your Red Velvet Bottom Cheesecake Mini Brownies in an airtight container in the refrigerator for up to 5 days. You can also freeze them for up to 2 months and thaw at room temperature or in the refrigerator.
Can I make Red Velvet Bottom Cheesecake Mini Brownies ahead of time?
Yes, you can make the mini brownies ahead of time. You can prepare the red velvet layer, cheesecake middle, and brownie top layer separately and assemble them just before baking.
How do I achieve the right consistency for the red velvet layer?
To achieve the right consistency, make sure to mix the batter until it’s smooth and there are no lumps. You can also adjust the amount of liquid ingredients to achieve the desired consistency.
What type of flour is best for making Red Velvet Bottom Cheesecake Mini Brownies?
You can use all-purpose flour or cake flour to make the red velvet layer. Cake flour will give a tender and fine texture, while all-purpose flour will provide a slightly denser texture.
Can I use a different type of pan to bake the mini brownies?
While a mini brownie pan is recommended, you can also use a regular-sized brownie pan or a muffin tin. Adjust the baking time accordingly to ensure the brownies are cooked through.
How do I know when the mini brownies are done baking?
You can check for doneness by inserting a toothpick into the center of a brownie. If it comes out with a few moist crumbs, the brownies are done. You can also check the edges, which should be set and slightly pulled away from the pan.